Building a projection mapping system to deliver mind-blowing visual experiences
Key takeaways:
- Start by determining your project's parameters: These include the size and characteristics of your projection mapping surface, your audience, and your budget.
- Assemble your team: Roles can include creative director, producer, and technical director.
- Select the right technology, including projectors, warping, blending and auto-alignment tools, and media servers.
- Determine a workback schedule for your project.
In the article “Projection Mapping 101,” we delved into projection mapping – what it is, how to get started, and why to use it.
Now, in “Projection Mapping 201,” we’ll take this a step further and learn about setting project parameters, selecting the right team, technology, and tools, and setting project timelines. Let’s go!

Laying the foundation
As with any major endeavor, determining your parameters is paramount at the beginning of your projection mapping project.
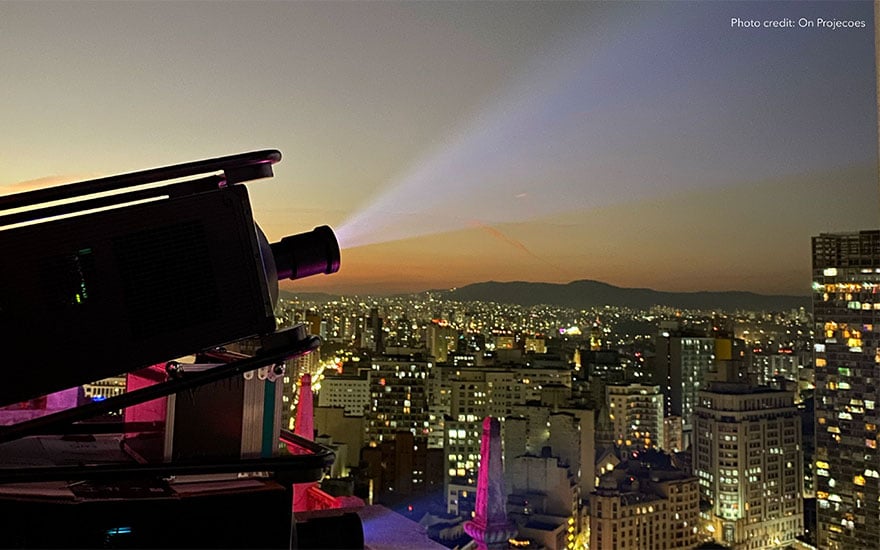
These include considering your audience – who are they? Where will they be seated? – and the fixed elements of your project, like the time of year your projection mapping installation will take place (as we learned in our previous blog post, weather can impact the projected image!), and the characteristics of the structure or object you’re mapping onto.
Take a good look at your projection mapping surface. Are there variations in color and dimensions or special architectural features that need to be unified? Is your surface exceptionally curved, like the roof of the Sydney Opera House? This is all part of your project’s foundation. We’ll examine how to address these via your projection solution below.
Before we get into projection mapping technology, there’s one more pillar in the planning process to consider: the budget. Your budget should include line items for technology, creative costs, installation, and what you expect in return from your investment. Your ROI can include monetary returns like ticket sales or sponsorship revenue.
Assembling your team
Projection mapping requires a team of individuals with different skill sets or team members who can take on multiple roles. Depending on the size and complexity of your project, you may find that you have all the expertise you need if you’re using a staging company or systems integrator. Here are a few of the roles that you should consider:
- Creative director: They drive the creative process.
- Producer: With creative and technical skills, the producer is the overall project lead at a macro level.
- Content developer: They conceive and produce graphics and video.
- Technical director: They’re in charge of technical scoping and project execution.
- Project manager: They’ll oversee the project at a micro level, managing the hundreds of details involved.
- Production designer: They have design, media, and technical skills.
- Installation team or systems integrator: This team handles equipment setup, cabling, connectivity, and other on-site elements, and optimizes the presentation.
Selecting the right projection mapping technology
You’ve mapped out your project and assembled your team: Now it’s time to choose your technology.
Choosing a projector
When evaluating projectors, there are a few key criteria to keep in mind since these can impact which projection solution will be the most effective:
- Brightness and resolution
- Processing power
- Warping and blending capabilities
- Color reproduction capabilities
- Rigging and mounting angles
- Power requirements
For larger or more complex projection mapping installations, RGB pure laser projectors offer a high-brightness, feature-packed solution. These projectors range in brightness from 15,750 lumens up to 50,000 lumens and offer exceptional color reproduction. For a more expansive color experience, they can reproduce 98% of the Rec. 2020 color gamut, ideal for projects that require lifelike visuals or an expanded color gamut for IP or branded colors. Sometimes you just need the perfect red for your brand or movie characters!
These projectors are often omnidirectional, which means that they can be installed at any mounting angle, and they are compatible with a range of software to ensure easy warping, blending, and consistent alignment (more on this below!). RGB pure laser projectors are ideal for medium- to large-scale installations that require a high-performance solution.
For slightly smaller or less complex projects, 1DLP laser projectors offer brightness of up to 23,750 lumens and are a powerful, reliable, and cost-effective solution for projection mapping projects. These projectors deliver an enhanced color performance that moves the needle closer to the color gamut you get with 3DLP projectors.
Alignment, warping, and blending tools
Whether you’re projecting onto a building, landmark, or curved surface, projection mapping requires expert image configuration, alignment, and warping and blending. With camera-based alignment and calibration software, you can quickly install, align, stack, calibrate, and maintain multi-projector systems in minutes with repeatable accuracy that saves you hours of painstaking work.
Equipping yourself with monitoring and control software helps simplify the task of managing multi- projector systems. You can instantly identify projectors to view their health or shutter status, perform remote firmware updates, and access the Web UI of individual projectors on the same network — all from one central laptop.
Media playback and show control
Spectacular visual experiences call for robust and reliable media servers and show control software for real-time video playback and processing. These tools let you create dedicated custom interfaces to interact with your system or create controls for your specific show needs. Layer-based timeline composition helps manage your show schedules: Customize it for any display type, experience frame-accurate synchronization to any scale, and combine it with audio or lighting cues, and more.
Setting timelines
Projection mapping projects often take considerable time to plan and develop. Establishing your goals, assembling your team, and selecting your technology all need to be part of your project plan, in addition to budgeting time for content development. Here’s a sample, condensed overview of a six-month workback schedule for a projection mapping project:
|
6 months out
|
5 months out
|
4 months out
|
|
3 months out
|
2 months out
|
1 month out
|
|
2 weeks out
|
2 days out
|
The main event! Don’t forget to take a moment to enjoy the results – you made magic happen for the audience! |
Are you ready to get started?
You’ve got this! Projection mapping delivers an unrivaled visual spectacle that captivates audiences. Let us know how it goes! Tag us on social with @ChristieDigital - we can’t wait to see what you create.
Looking for more information and resources to help you get started on your projection mapping project?
Check out our new Projection mapping primer, as well as our Projector selection guide, and Projection solutions brochure.
If you have any questions, we’re here to help. Reach out!